Monday, July 25, 2011

A quick study of lenses and light

I took these two photos recently of my littlest. While I didn't design or plan these photos ahead of time (I simply grabbed my camera and used what lens was on it to snap pictures), they demonstrate a couple of things.

Both are taken in pretty much the same location, though at different times of day and she is turned a different direction in each.

In the first, she is facing the large bank of windows on one side of our living area. Notice how her face is all lit up, the light is mostly touching her right side with shadows next to her nose and on her left side, and there is a nice catch-light in the upper part of each iris. We want these shadows, as they give the face shape. This is close to "Rembrandt" style lighting, with mostly only one side of the face lit and a triangle of light on the other cheek.
Notice, however, that her hair is dark. There is no light coming from behind.

The other thing I want to point out is the lens choice and aperture used here. I am using a 50mm lens ("normal" lens) with an aperture of f/2. The aperture of f/2 provides the shallow depth of field. While she is pretty much the same size (as the second photo) relative to the frame of the photo, notice that her arms and nose actually look a bit larger!

Here is the other photo:


It is actually the same baby! Here I used a 135mm focal length lens, with an aperture of f/4.0. Both photos have nice blurring in the back and fore-ground, due to a shallow depth of field for that lens. But I was physically closer to the baby when I used the 50mm lens, so those parts of the scene closer to me look a little distorted - they look bigger.

Back to light: In the second photo she is back-lit by the same windows providing light in the first photo, and some light falls on the left side of her face. I had to over-expose the scene in order for her face to be bright enough, and her eyes don't have the nice catch-lights (sparkle). However, since the light is coming from behind, her head does have a nice rim-light, giving a sense of separation from the background, and giving a lightness to her hair.

You might also notice the patch of very bright light on her seat from the little bit of direct sunlight hitting her. This ended up being way over exposed in order to light the baby up, so we see what is called "clipping" - the patch of light is so bright we've lost all detail in that spot. (she is also wearing a large cloth diaper)

I prefer the 135mm lens for this photo, so her features aren't distorted. I also like the back-lighting. If we wanted to combine the best of both we could move her out of the patch of sunlight and use a light or reflector in front and above her slightly to get better lighting.


Saturday, July 9, 2011

Wednesday, July 6, 2011

Yellow Ribbon Photographers

I've joined Yellow Ribbon Photographers, photographers nationwide committed to providing professional and quality photography at no cost to our nation's service men and women.


Be sure to pass the information about this service to soldiers you know!

Tuesday, July 5, 2011

Newborn Pictures

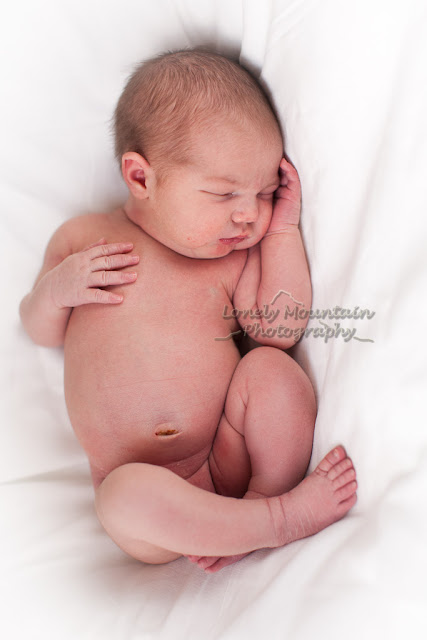
Our littlest girl was born mid-April. Did you know that the best time for getting those adorable sleeping newborn photos is when they are under 10 days or two weeks? This when they sleep more and are more movable when sleeping, and also before the acne can set in.

Here are a few photos we took very early on. A beanbag is great for positioning. Here I covered it with a white curtain next to a large window (no direct sunlight) and my husband held a reflector to bounce light back into the shadows. I used an aperture of f/2.2 and speed of 1/640 second, and I set it to over-expose by about 1 1/2 stops. I had to adjust the ISO to 1000 to be able to get these settings.


Here she is on our bed asleep and positioned so the light from the window falls directly on her face (again I don't want direct sunlight). There was also some light from other windows lighting her back. I am using a 50mm lens with an aperture of 2.2. I generally use aperture priority mode so the camera adjusts the speed to get the total exposure needed. I had it set with evaluative metering set to +1 2/3 to over-expose from what the camera would do automatically. I wanted her face lit well and with such a white background the camera would have tried to under expose to average out the brightness of the whole scene. However, the speed it was forced to use to get the exposure how I wanted it was a 60th of a second. Since the baby was so still this was ok, but it is generally slower than I like since it can show blurriness with much movement (not good for small children). I also brightened more in my editing and increased the contrast. ISO was again 1000. I could have raised this to get a faster shutter speed.


I designed this photo in my mind and set it up where I have light coming in several windows of varying amounts. Then my husband quickly positioned her and stood behind her ready to reach for her if she moved. With a dark background you do not want to over-expose as the camera automatically will bring up the exposure on the darks to average out the light on the whole picture. This has a VERY shallow depth of field with an aperture of f/1.2. ISO was still set at 1000 and I could have brought it down here.


I wanted photos of her hand(s). So when I was holding her once I asked my husband to take photos while I positioned her hand so they was lit well from the nearby window. The light wasn't as bright here so we had to increase the ISO to 6400 in order to get a decent exposure. This is possible with my camera (Canon 5D) and the quality stays decent. With a higher ISO you really need to nail the exposure in camera to avoid as much of the inherent graininess as possible. The aperture here is f/4.5 (a little more in focus front and back of the focus point), and speed was 1/125 second. I converted it to black and white in post processing.


Lastly, here is the announcement I created using a template. (I didn't include everything written in it here) It folds into thirds:


A couple more very important things to look for:

Camera angle: the closest thing to the camera will look the largest in the final photo. If you take a photo from below the chin - the chin will look large!Of course it depends on the feeling you want to portray with your picture, but I think the most flattering angle for a portrait is to position the camera at eye level or a little above.

Focus: If you are taking a picture of a person's face, make sure the camera is focused on the eyes! Generally cameras are set to focus on the center of the photograph, but sometimes the camera is set to focus as generally as possible taking into account a number of focal points. You need to set your camera's focal point on one spot. I generally like to use center focus then recompose so everything is in the photo where I want it, but sometimes I set a different focal point so I don't need to move the camera so much.  If you just pick up the camera and take a picture and don't take into account what it is focusing on, generally it will focus on what is in the middle. If you are taking a picture of a face it is easy for the nose to be in the center. So this means your eyes will look duller and the nose will be crystal clear, giving the impression that it is larger than it is!